
In 1904, New York City planners were getting ready to open the first subway stations in the city. Worried that customers would be fearful in dark, underground spaces, they asked architects George C. Heins and Christopher Grant La Farge for a design solution, and the bright, white, glossy 3" X 6" subway tile was born. Today, the beautiful, clean subway tile look is ubiquitous and holds its own in almost any design style.
Often the first thing that comes to mind when you think of a subway tile is a white 3" X 6" in a classic horizontal arrangement. It's a timeless look, but if you'd like to push the design envelope a bit further, we've also included a few other arrangement and colour options that you might want to consider.
Classic
A timeless and beautiful tile arrangement, the classic pattern is created by overlapping your tiles by half their length. The arrangement works really well paired with bold design elements like patterned tiles because it doesn't try to steal the show, but still offers a rich, durable texture to your wall. We think this Candlestick White subtle brick look is going to be a classic choice for many years to come!
Another option for the classic arrangement is to lay the tiles against a contrasting grout – either a light tile with dark grout, or the opposite. Keep in mind that this creates a busier look, but can be great for spaces where the rest of the design elements are a bit more muted.

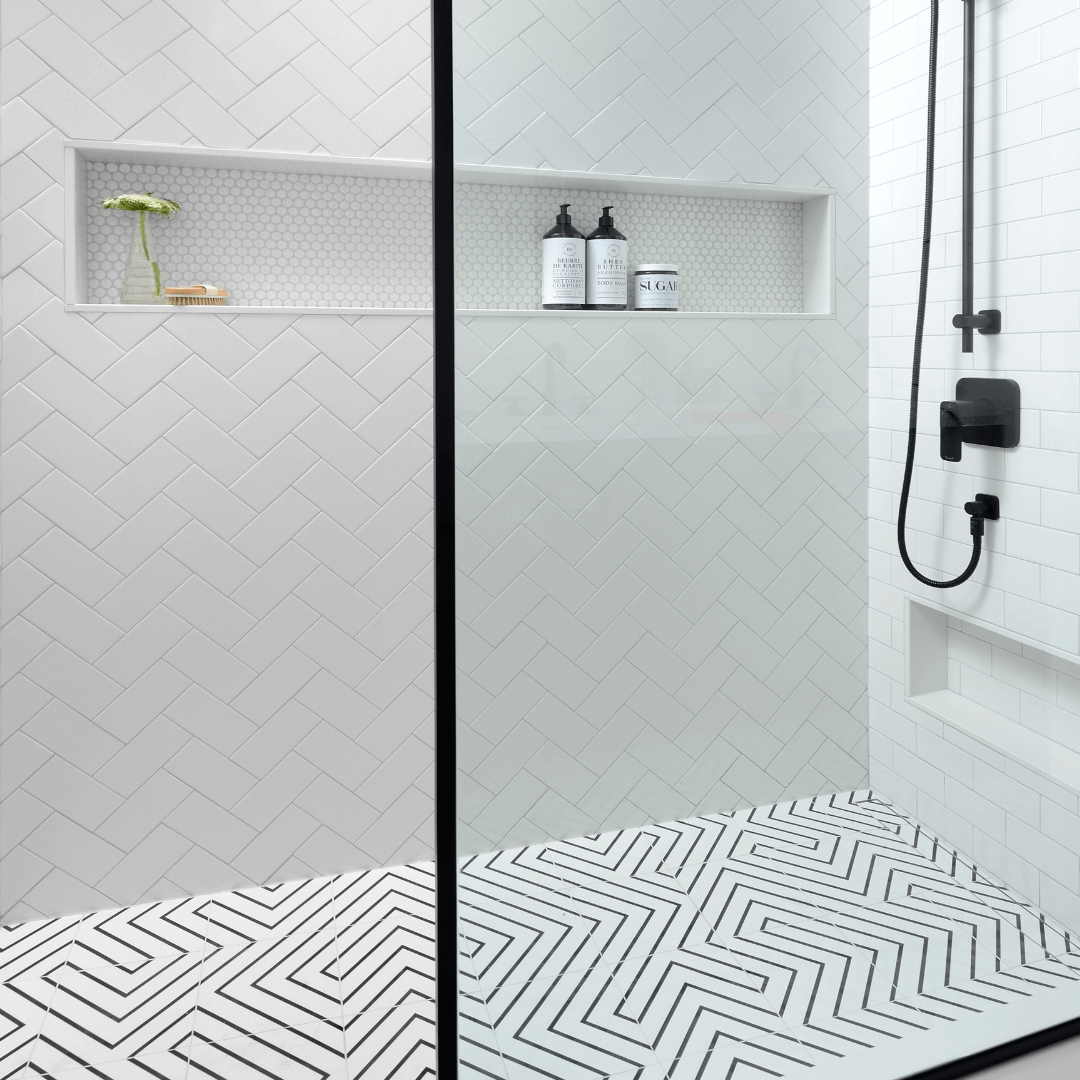
Herringbone
Herringbone continues to be one of the most popular arrangements in both floor and wall tile layouts. The zig-zag pattern is a modern and stunning visual effect. It also creates interest to the space and can help guide the eye. To reinforce vertical lines in kitchens with a high ceiling, a classic herringbone layout for the kitchen backsplash can work really well. For smaller kitchens with less vertical wall space, a horizontal herringbone could help accentuate the breadth of the space. We've seen this pattern rise for floor installations as well! Below is a photo of our Clay Chalk 11" x 2.75" tiles.

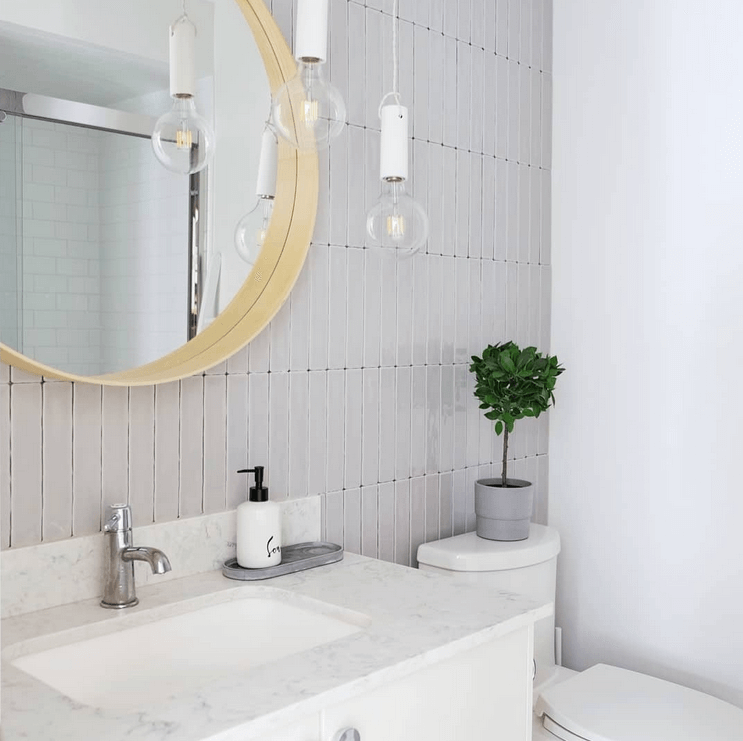
Stack
Stack tiling is easy on the eyes with its clean lines. The tiles are simply aligned with each other and placed in repetitive grids. It’s a great arrangement for minimalist interior spaces and those with prominent rectilinear forms. A particular favourite of ours is a vertically stacked arrangement using an elongated subway tile, such as our Candlestick (Grey pictured below), which can give a beautiful effect similar to long-panel Wainscotting. We've been seeing this pattern installed more and more lately. For more inspiration with this shape we have launched our Keys collection & Stack Mosaics!

Basketweave
Basketweave bears resemblance to a woven basket at a 90-degree angle. The effect is created by laying the subway tiles in groups that create square blocks. The number of tiles in a block depends on the ratio of the length to the width of the tiles. For a standard 3” X 6” tile, you’d need two tiles laid side-by-side to create a square, since the tile is twice as long as it is wide. For an elongated subway like our 10” X 2.5” Matisse Blue, four tiles would create your square like the photo below. The weave is achieved by placing the next square block at a 90 degree rotation, and repeating the pattern across the wall.

Here are a couple more...

Step Ladder: Very similar to the 45 degree Herringbone, this arrangement is possible when the ratio of the length to width of the tile is exactly 2:1. Two rectangular subway tiles are attached to form an ‘L’ shape first, and then overlapped with other 'L's to create a moving ladder effect – definitely a great way to elevate a space!
 English Bond: a row-by-row alternation of two different sizes of subway tiles. You can also just use a single size of tile and cut it to use in your shorter-length rows. The classic English bond pattern keeps the shorter tile at approximately half the width of the longer ones, but we believe it can entirely be up to your creativity!
The following two tile arrangements require additional cutting than the ones presented so far, but we didn’t want to exclude them as they have a lot of design potential.
 Windmill: Sometimes also known as a pinwheel, this beautiful arrangement is achieved by laying four rectangular tiles revolving around one square-cut tile. We’ve seen quite a few arrangements of this using different colours of center and outer tiles, but you can also use the same coloured tile throughout for a sleek, subtle, and modern look.

Of course to achieve the looks described above, the first step is to pick out your subway tiles! Here at TilesInspired, we have lots of beautiful options on hand!
Our 3" X 6" Subway collection is both clean and timeless with its straight shapes and smooth yet reflective surface. Today, this look is widely used by professionals working in both commercial and residential interior design. The simplicity of these tiles is perfect for toning down bolder design elements in a modern setting.
Our 10" X 2" Candlestick tile collection is a beautiful elongated subway tile option. Its slim shape and handmade look makes it stand out among rectangular tiles, and its soft, rich glazed body brings depth to any installation. Some of the latest interior designs are showcasing these types of tiles in both herringbone and vertically stacked arrangements.
If there is one thing to remember from this blog, it’s that the subway tile is anything but boring. Between size, texture, shape, colour, grout choice, and of course, arrangement, your design possibilities to create something unique to your vision is almost limitless. We hope this post has helped you along your design journey, and we can’t wait to see the one-of-a-kind spaces you create!